Foaming during liquid filling can turn a clean production run into a frustrating adjustment. Bubbles rise in the bottle, distort fill levels, and sometimes leave product on the cap or conveyor. How to prevent foaming during liquid filling depends on the liquid, equipment, and filling pattern. A thin detergent may behave differently from a syrup, sanitizer, cosmetic, or beverage. My experience with filling trials suggests that small changes often matter: lowering pump speed, reducing turbulence, or moving the nozzle closer to the liquid surface. Yet no single setting works everywhere. That assumption deserves testing.
This guide examines seven practical ways to reduce foam, from controlling flow and temperature to choosing suitable nozzles and filling below the surface. It also considers tank agitation, suction conditions, product viscosity, and container geometry. Operators should watch the actual process, not rely only on machine displays. A transparent test bottle can reveal foam that a sensor misses. Record fill speed, pressure, product temperature, and foam height. Simple records build reliable evidence. They also expose mistakes.
The recommendations are grounded in standard filling principles and shop-floor troubleshooting, but they are not a substitute for validation. Product quality, hygiene, and worker safety must remain central. Test one variable at a time when possible, then confirm the result across different batches and container sizes. A quiet line is not always a stable line. Sometimes foam returns after cleaning, warming, or changing a pump. That is why prevention requires observation, measured adjustments, and a willingness to revise an attractive but incomplete solution.
Foam control starts with measurement, not guesswork. ASTM D1173 records foam height immediately and again after five minutes. Report both values in millimetres. A sample measuring 120 mm at zero minutes and 45 mm after five minutes shows rapid collapse, but it may still foam during filling. The method describes surfactant behaviour under controlled conditions. It does not predict every production line. That limitation matters.
Use seven practical controls: lower pump speed, reduce pressure changes, keep the nozzle submerged, avoid free-fall drops, remove sharp bends, improve tank venting, and verify temperature stability. Compare the liquid’s ASTM D1173 profile with line trials. For example, a 30 mm foam layer may seem harmless in a wide vessel. In a narrow bottle, it can block the fill sensor and slow output. Industry testing reports should include liquid temperature, nozzle size, fill speed, and container geometry. Otherwise, comparisons become weak.
Foam often starts before filling. High-speed mixing, powder addition, and pump suction can pull air into the liquid. Entrained air may remain invisible until pressure changes inside the filling nozzle. Vacuum degassing removes much of this trapped air before the product reaches the filler.
Apply vacuum gradually to prevent sudden boiling or product loss. A moderate vacuum level, gentle agitation, and sufficient residence time usually work better than maximum vacuum. Watch the liquid surface carefully. Large bubbles should rise and collapse before filling begins. Viscous liquids may need more time because air moves slowly through their structure. Temperature also matters, but excessive heating can change viscosity or damage sensitive ingredients.
Tips: Hold the degassed liquid in a calm, covered vessel for a controlled period. Avoid returning foamy overflow to the main tank without checking it. Keep the transfer line flooded, and reduce sharp bends before the nozzle. Record vacuum pressure, holding time, temperature, and foam appearance during each trial. Small changes can reveal the real cause.
Do not assume longer holding always improves results. Some liquids absorb air again during transfer or develop foam after additives settle. In practice, a short validation run often exposes this weakness. Compare samples taken after degassing, after holding, and directly from the filled container. Check fill weight, visible bubbles, and container headspace. If foam remains, reduce pump speed or review the inlet design before increasing vacuum further.
Foam often begins where operators expect speed to improve output. Pump speed, back pressure, and flow rate should be tuned together, not separately. Start gently. Reduce pump speed by 10–20% during trials, then watch the liquid entering the container. A narrow, high-velocity stream can pull air into the product, especially when the nozzle sits above the liquid surface. Keep the inlet submerged when the formulation allows it, and use smooth bends instead of abrupt fittings.
Back pressure needs careful adjustment. Too little pressure can create pulsation, while excessive pressure may increase shear and leakage at seals. Record pressure, temperature, fill weight, and visible foam for every setting. FDA’s Process Validation guidance identifies these variables as critical process parameters requiring documented operating ranges. EU GMP Annex 1 also emphasizes continuous monitoring and contamination control during sterile processing. These requirements support a data-led approach, rather than relying on appearance alone.
Flow rate should rise gradually after the pump reaches a stable condition. A practical trial might compare 60%, 75%, and 90% of the validated rate, using identical containers and liquid temperature. Allow enough dwell time for bubbles to collapse before capping. USP General Chapter <1207> also stresses controlled, science-based container closure evaluation, which matters when foam causes incomplete seals. Some products still foam unpredictably. That is the uncomfortable part. A visually calm run may fail after several hours, so repeat testing across shifts and temperatures is essential.
| No. | Foam-Control Method | Primary Operating Variable | Recommended Starting Practice | Why It Helps | What to Monitor |
|---|---|---|---|---|---|
| 1 | Reduce pump speed | Pump RPM and acceleration rate | Lower speed gradually while maintaining the required fill rate; use a controlled ramp rather than an abrupt start. | Lower velocity and gentler acceleration generally reduce turbulence, air entrainment, and shear-sensitive foam formation. | Visible foam height, fill-time variation, product temperature, and actual pump output. |
| 2 | Optimize back pressure | Discharge pressure and pressure stability | Use only the back pressure needed for stable, repeatable flow; adjust in small increments and avoid sudden pressure changes. | Stable pressure can reduce pulsation, flashing, and abrupt pressure drops that release dissolved or entrained gas. | Pressure before and after the pump, pulsation, leakage, and consistency of the fill stream. |
| 3 | Control the flow profile | Flow rate, start/stop ramp, and filling stages | Begin with a slower bulk-fill phase, then use a lower finishing flow near the target volume when the equipment permits. | A staged profile limits splashing and surface disturbance while preserving reasonable production speed. | Foam at the start and end of the cycle, fill accuracy, cycle time, and nozzle discharge pattern. |
| 4 | Fill below the liquid surface | Nozzle position and submergence depth | Use bottom-up or diving filling where container geometry and sanitation requirements allow; keep the outlet from free-falling into the liquid. | Reducing free-fall distance decreases surface impact, splashing, and air entrainment. | Nozzle-to-product clearance, container contact risk, drip control, and fill-level consistency. |
| 5 | Remove air from the product and line | Tank agitation, suction conditions, and line priming | Avoid vortexing, keep the pump adequately flooded, fully prime the product path, and use deaeration when the formulation requires it. | Less entrained air gives bubbles fewer opportunities to expand into visible foam during filling. | Tank vortex formation, suction pressure, bubble content, pump noise, and intermittent flow. |
| 6 | Use smooth, low-restriction product paths | Hose routing, fittings, valves, filters, and internal surface condition | Minimize sharp bends, unnecessary restrictions, dead legs, leaks, and partially open valves; size components for the required flow. | Lower local pressure loss and fewer abrupt velocity changes reduce turbulence and air leakage points. | Differential pressure, flow stability, clamp and seal condition, and filter loading. |
| 7 | Manage formulation and temperature | Viscosity, surface tension, temperature, and antifoam compatibility | Fill within the validated temperature range, avoid unnecessary heating or cooling, and evaluate compatible antifoam only through controlled product trials. | Viscosity and surface properties influence bubble formation, drainage, and foam persistence; temperature changes can alter both. | Product temperature, viscosity, pH, foam persistence, and finished-product quality attributes. |
Practical note: The best settings depend on viscosity, surface tension, dissolved gas, container geometry, pump type, and nozzle design. Validate adjustments with fill-weight, appearance, and product-quality checks before routine production.
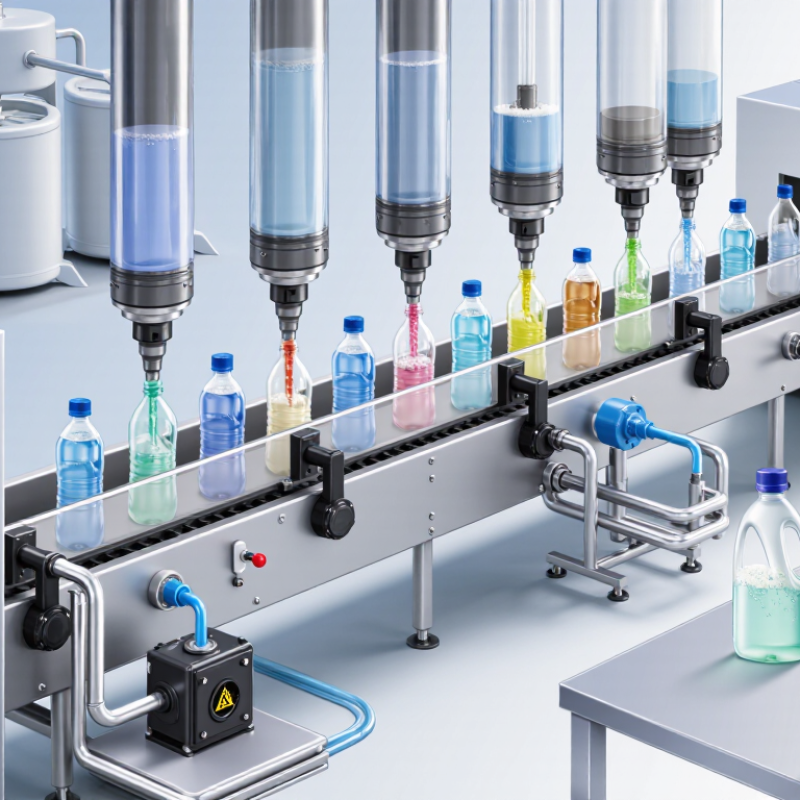
Foam often starts when liquid falls through air, strikes the container base, or enters too quickly. Bottom-up filling reduces these disturbances by introducing liquid near the lowest point. The nozzle rises gradually as the fill level increases. This method keeps the liquid surface calm and limits trapped air. It works especially well with detergents, syrups, and other low-viscosity liquids.
A submerged nozzle offers another strong control. Keep its tip below the liquid surface during most of the filling cycle. The liquid then travels through liquid instead of splashing into open air. Operators should also lower the initial filling speed, stabilize pump pressure, and avoid sudden valve changes. Smooth acceleration matters. Temperature control helps too, because warmer liquids may flow differently and release bubbles slowly.
Container shape deserves attention. Narrow openings and sharp internal corners can create extra turbulence. Test several nozzle heights, filling speeds, and withdrawal rates on the actual container. Small bubbles matter. Inspect filled containers after several minutes, not only immediately. In practical trials, one setting rarely solves every product problem. A submerged nozzle may reduce splashing but still leave foam if the pump draws air or the liquid contains unstable surfactants. Check seals, supply lines, and inlet levels before changing the whole filling system.
Impact velocity is calculated from the free-fall equation v = √(2gh), using gravitational acceleration of 9.81 m/s². Reducing the drop height through bottom-up filling or submerged nozzles lowers liquid impact, splashing, air entrainment, and the likelihood of foam formation.
7 Best Ways to Prevent Foaming During Liquid Filling
Foam often begins before the product reaches the container. Control liquid temperature, pump speed, nozzle height, and filling pressure. Keep the nozzle below the liquid surface when suitable. Reduce turbulence with a steady, narrow stream. Check vessel positioning, nozzle centering, and anti-drip timing. These seven controls should be tested separately, then under combined operating conditions.
Use a documented trial plan with identical containers, operators, and product batches. Record fill volume, temperature, speed, foam height, and settling time. Collect repeated fills from each condition. ISO 5725 repeatability principles help show whether one setting produces stable results under the same conditions. Calculate the average, range, and standard deviation for each set. Compare these results with fill-volume limits, not visual appearance alone. A quiet surface can still hide inconsistent dosing.
Tips
Take at least ten consecutive fills during each trial. Photograph foam at a fixed time, such as five seconds after filling. Mark nozzle height in millimetres, because “low” is not a reliable instruction. Clean equipment before testing. Residue can change bubble formation. The first trial may fail. That is useful evidence, not wasted work. Review unusual results carefully, since one operator’s technique may influence repeatability. Temperature drift is easy to overlook. Measure it throughout the run, not only at the beginning.
Foam may begin during mixing, powder addition, or pump suction. Air can remain invisible until pressure changes near the nozzle. The problem may start earlier than expected.
Gradual vacuum removes much of the entrained air before filling. Use gentle agitation and enough residence time. Maximum vacuum is not always better. Watch large bubbles rise and collapse.
Record vacuum pressure, holding time, temperature, and foam appearance. Keep the liquid in a calm, covered vessel. A viscous liquid may need longer because air moves slowly. Longer holding can still fail.
Yes. Temperature changes viscosity and bubble movement. Moderate warming may help bubbles escape. Excessive heat can damage sensitive ingredients or change flow behavior. Check the actual product, not assumptions.
Tune pump speed, back pressure, and flow rate together. Try reducing pump speed by 10–20% during trials. Watch the liquid entering the container. Lower speed may reduce air pickup.
Bottom-up filling introduces liquid near the container base. The nozzle rises as the liquid level increases. A submerged nozzle keeps its tip below the surface. This reduces splashing and trapped air.
Compare controlled settings, such as 60%, 75%, and 90% of the validated rate. Use identical containers and the same liquid temperature. Increase flow gradually after pump conditions stabilize. Allow bubbles time to collapse before capping.
Narrow openings, sharp corners, abrupt bends, and high-velocity streams may create turbulence. Keep the transfer line flooded when possible. Use smooth bends and avoid sudden valve changes. Small design details matter.
Compare samples after degassing, after holding, and after filling. Check fill weight, visible bubbles, and container headspace. Inspect containers again after several minutes. A calm surface can still hide later failure.
How to prevent foaming during liquid filling starts with measuring the problem rather than relying on visual judgment. Use ASTM D1173 to compare foam height immediately after filling and again after five minutes, creating a consistent baseline for process improvements. Entrained air can then be reduced through vacuum degassing and an appropriate, controlled holding time before filling. Foam formation is also minimized by lowering shear: adjust pump speed, back pressure, and flow rate gradually while monitoring fill consistency.
The filling method is equally important. Bottom-up filling and submerged nozzles help prevent splashing, turbulence, and air incorporation, especially when handling low-viscosity liquids. Finally, validate all seven controls with repeatability testing aligned with ISO 5725 and by reviewing fill-volume data across multiple runs. This structured approach helps identify the most effective settings, improves process stability, and supports reliable production with less foam and fewer filling defects.

Yongli Machine