Bottle jams can stop an automatic filling line within seconds. One tilted container may block the infeed star wheel, trigger a sensor fault, and leave liquid dripping beneath the conveyor. Learning How to handle bottle jams in automatic filling machines protects product quality, equipment, and operators.
Packaging-line reliability consultant Dr. John Henry explains, “A bottle jam is rarely random; it usually reveals a weakness in setup, timing, or control.” His observation reflects practical maintenance experience. Operators should not reach into a moving machine. Stop the line, isolate energy sources, and follow the equipment manufacturer’s safety procedure. Then identify where the jam began, rather than removing only the visible bottle.
Small details matter. Check guide-rail spacing, conveyor speed, bottle shape, cap alignment, and sensor cleanliness. A worn timing screw can create repeated collisions. A loose rail may turn stable containers into leaning bottles. The evidence is often beside the jam: scuff marks, spilled product, cracked plastic, or an unusual machine sound.
Do not rush.
This guide examines how technicians diagnose and clear jams safely. It also considers adjustments that prevent the same failure from returning. Still, no universal setting works for every filling machine. Container materials, line designs, liquid viscosity, and production speeds vary. That limitation deserves attention. A quick adjustment may restore production today, yet create hidden wear tomorrow. Reliable results come from measured checks, documented changes, and careful observation after restart.
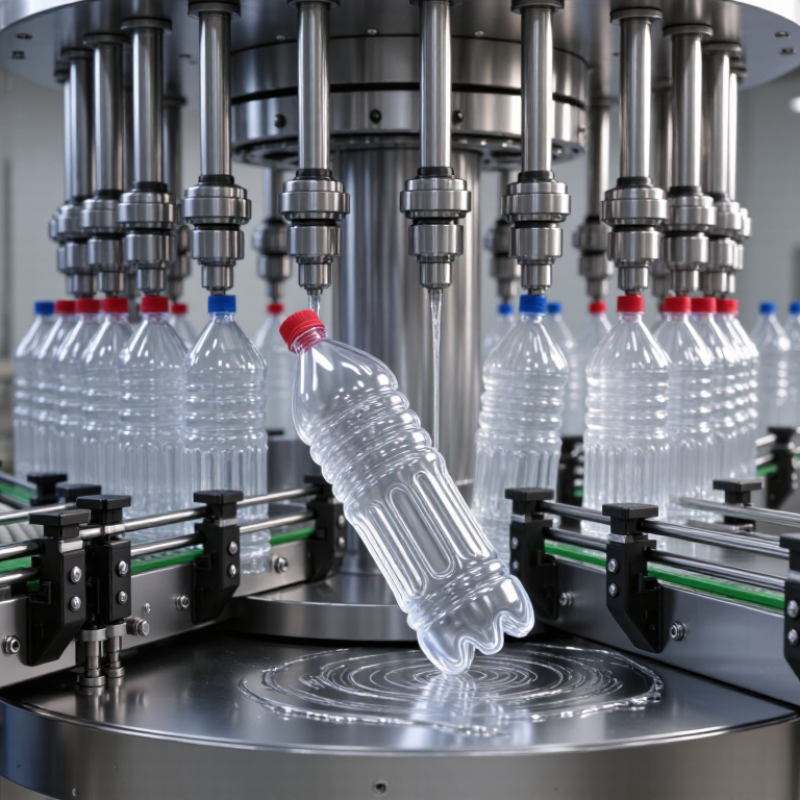
2026 Best How to Handle Bottle Jams in Filling Machines?
Bottle jams rarely begin with a sudden stop. In many production lines, the first clue is uneven spacing before the filling station. Bottles may lean, rotate, or touch the guide rail. A faint rattling sound can also signal rising conveyor pressure. Stop and inspect early.
Common causes include incorrect guide-rail width, unstable conveyor speed, and bottles with warped bases. A worn star wheel or damaged timing screw may push containers sideways. Product residue can make belts slippery and reduce bottle control. Sensor lenses may also collect dust, causing false readings. I have seen operators adjust speed first, while the real problem was a misaligned rail.
Watch the infeed closely. If bottles queue in a tight cluster, downstream pressure is increasing. If one container repeatedly stops at the same position, check that area for mechanical interference. Review recent maintenance records, changeover settings, and bottle dimensions. Measurements are more reliable than guesses. Use the machine’s approved isolation procedure before removing a jam. Never reach into moving equipment.
A short pause helps. It also exposes weak habits. Some teams replace sensors too quickly without checking alignment, wiring, or buildup. That mistake wastes time and hides the original cause. Record the exact location, bottle condition, machine speed, and warning signs after every event. Over several shifts, these details can reveal a pattern that a single inspection misses.
Identify the Causes and Warning Signs of Bottle Jams
The chart ranks common bottle-jam causes and early warning signs by practical troubleshooting priority on a 1–5 scale. Misaligned guides, unstable bottle spacing, conveyor speed mismatch, damaged containers, excessive line pressure, rising motor load, repeated sensor signals, and irregular bottle flow should be checked first when a filling line begins to jam.
Stop the filling machine immediately when bottles jam. Do not reach into the conveyor or filling zone while parts are moving. Press the designated stop control, then wait until every bottle, belt, and rotating component becomes still. Silence is not enough. Check for trapped motion, air pressure, and stored mechanical energy.
Secure the work area with a visible barrier or warning sign. Keep nearby operators away from the machine until the blockage is controlled. Follow the site’s isolation procedure before opening guards or entering the jam area. This may include disconnecting electrical power and releasing pneumatic pressure. A trained technician should verify zero movement with approved equipment. Wear suitable gloves and eye protection, but never treat PPE as permission to work on energized equipment.
Remove damaged bottles with the correct tool after isolation is confirmed. Glass fragments, spilled product, and sharp plastic edges can create secondary hazards. Experienced teams also inspect the conveyor guide, timing screw, sensors, and bottle spacing. A small alignment error can cause repeated jams. In practice, people sometimes restart too quickly after clearing one bottle. That shortcut is easy to regret. Record the jam location, machine settings, and visible damage before restarting slowly under observation. The first restart may still fail. Stop again if bottles lean, scrape, or hesitate.
A bottle jam can stop production in seconds. It can also bend guides, strain conveyors, or crack sensors. Stop the machine through its normal control station. Then isolate electrical, pneumatic, and other stored energy according to site procedure. Do not reach through a guard or pull bottles while parts can move. Confirm zero motion before opening the guarded area. A trained operator should check the equipment manual and lockout procedure.
Remove bottles from the outside inward, using steady hand pressure and suitable tools. Never use a metal bar against a sensor, star wheel, or filling nozzle. If glass is present, wear required eye and hand protection. Use a brush or approved pick-up tool. Release air pressure before touching pneumatic stops. Clear fragments from the conveyor and inspect guide rails, timing screws, belts, and sensors. Look for scratches, loose mounts, and unusual gaps. Small damage can create another jam.
After reassembly, remove tools and close every guard. Restore energy only when all staff are clear. Jog the machine at low speed, then watch one empty bottle through the affected section. Listen for clicking or rubbing. In practice, the first diagnosis is not always correct. We have all blamed the conveyor too quickly. Record the jam location, bottle condition, settings, and corrective action. That record helps maintenance identify repeated alignment or timing problems before they cause costly failures.
Bottle jams usually begin with small changes in the handling system. A tilted guide rail, worn conveyor belt, or unstable bottle can quickly stop production. Operators should inspect the entire path, not only the visible blockage. Check the infeed star wheel, guide rails, conveyor joints, sensors, and discharge area. Look for scuff marks, broken plastic, loose fasteners, and liquid around the conveyor. These details often reveal the real cause. Stop the machine safely before reaching into any moving section. Never remove a jam by force.
Adjust the system gradually. Set guide rails with enough clearance for steady bottle movement, but avoid excessive space. Confirm that belts run at similar speeds and that bottles remain upright through transfers. Sensor positions may also need correction after a format change. I have found that one millimeter can matter, although this is easy to overlook. Do not rely on sound alone. Watch several empty bottles, then run a small batch filled with product. Check for collisions, hesitation, and pressure buildup. The test may expose a problem that the inspection missed.
Tips: Keep a simple jam log with the time, bottle size, location, and adjustment made. Clean conveyor surfaces before testing. Replace damaged guides early. If the same jam returns, question the adjustment instead of repeating it. A temporary fix can hide a deeper alignment problem.
Bottle jams in filling machines often begin as small process changes. A slightly tilted bottle can strike the guide rail, stop the infeed, and create pressure behind it. Operators should stop the conveyor safely and remove the blockage without forcing nearby bottles through. Record the location, bottle type, machine speed, and time of failure. These details reveal patterns that memory often misses.
Preventive maintenance reduces repeat jams. Inspect guide rails, star wheels, belts, and sensors at scheduled intervals. Check loose fasteners and worn contact surfaces during every changeover. Clean spilled product before it dries around photoeyes or conveyor joints. Confirm sensor alignment with a test bottle, not an empty conveyor. Lubricate only approved components and follow the equipment manufacturer’s service instructions. A five-minute inspection may prevent an hour of lost production.
Process control matters just as much. Keep bottle spacing consistent before the filling zone, especially after speed adjustments. Verify that the capper, filler, and conveyor speeds remain synchronized. Track jam frequency by shift and product format. If one format fails repeatedly, review its dimensions and handling conditions rather than blaming the operator. Our early assumption may be wrong. A clean machine can still jam when acceleration is too aggressive or guides are set too tightly. Change one setting at a time, then observe several production cycles before approving the adjustment. This creates reliable evidence and supports safer, more consistent operation.
| Control Area | What to Check | Recommended Frequency | Practical Target or Limit | Corrective Action |
|---|---|---|---|---|
| Jam Detection | Verify photoelectric sensors detect stopped, tilted, or overlapping bottles without false signals. | At start-up, after changeovers, and once per shift | No missed detection during a controlled test; sensor response remains stable at operating speed. | Clean the lens, correct the mounting angle, remove vibration, and confirm the sensing distance. |
| Conveyor Alignment | Inspect side rails, transfer plates, dead plates, belts, and conveyor transitions for snags or gaps. | Daily visual inspection; detailed inspection weekly | Bottle travel is centered and continuous, with no visible contact point that rotates or tips containers. | Align rails, tighten hardware, replace damaged wear strips, and smooth abrupt height changes. |
| Guide-Rail Clearance | Check the distance between the bottle body, neck, shoulder, and guide rails across the complete format range. | Every format change and after rail adjustment | Clearance is consistent from entry to exit and does not squeeze, drag, or trap bottles. | Use the approved changeover setting, lock adjustment points, and verify with several empty and filled bottles. |
| Conveyor Speed Balance | Compare speeds at the infeed, filler, capper, discharge, and accumulation sections. | At start-up, after maintenance, and during troubleshooting | No sustained bottle compression, gaps, or back pressure at transfer points. | Reduce the upstream feed rate, synchronize conveyor speeds, and remove excessive accumulation. |
| Bottle Quality | Inspect bottle dimensions, base stability, neck finish, deformation, contamination, and material consistency. | At each production lot and whenever jam frequency rises | Bottles remain upright and dimensionally compatible with the validated machine format. | Quarantine nonconforming containers, confirm incoming specifications, and adjust handling equipment only after quality is verified. |
| Filler Nozzle Position | Check nozzle centering, vertical travel, bottle presence, and the relationship between nozzles and bottle openings. | Daily and after product or bottle-format changeovers | No nozzle-to-bottle contact, bottle displacement, or splash that creates slippery conveyor surfaces. | Re-center the assembly, verify lift timing, and clean spills before restarting the line. |
| Lubrication and Wear | Inspect chains, bearings, belts, star wheels, timing screws, grippers, and wear components. | Daily condition check; scheduled service according to equipment duty and manual | No abnormal noise, heat, looseness, vibration, or visible wear affecting bottle travel. | Lubricate with the specified food-safe product where applicable, replace worn parts, and record the intervention. |
| Accumulation Pressure | Observe bottle density before the filler and identify pushing, leaning, spinning, or uncontrolled release. | Continuously during production; review after every jam | Bottles enter the filler in a controlled single flow without sustained back pressure. | Adjust accumulation logic, starve or slow the upstream conveyor, and investigate blocked discharge areas. |
| Changeover Verification | Confirm format settings for rails, timing screws, star wheels, sensors, nozzles, and conveyor guides. | Before releasing every new format to full speed | A documented low-speed trial passes before production speed is increased. | Use a signed checklist, mark repeatable settings, and correct deviations before ramp-up. |
| Jam Response | Stop the line safely, isolate energy when required, remove damaged bottles, and inspect the initiating point. | Every jam event | No restart until the cause is identified, the area is clear, and guards and sensors are restored. | Follow lockout and safety procedures, document the event, and verify a controlled restart at low speed. |
| Performance Review | Track jam count, location, product format, shift, downtime, damaged bottles, and suspected cause. | Per shift with weekly trend review | Recurring causes are ranked by frequency and downtime rather than treated as isolated events. | Apply root-cause analysis, prioritize the highest-impact failure mode, and verify that corrective actions reduce recurrence. |
Press the normal stop control immediately. Wait until belts, bottles, and rotating parts stop completely. Silence alone is not enough. Check for trapped motion and stored air pressure.
No. Never reach through a guard while parts can move. Keep nearby workers away. Use the site’s isolation procedure before entering the jam area.
Place a visible barrier or warning sign around the machine. Disconnect energy sources as required. Release pneumatic pressure. A trained person should verify zero movement with approved equipment.
Wear required gloves and eye protection. Glass fragments and sharp plastic edges may be present. PPE reduces injury risk. It does not make energized equipment safe.
Remove bottles from the outside inward. Use steady hand pressure and suitable tools. Use a brush or approved pickup tool for fragments. Avoid metal bars near sensors, guides, or nozzles.
Inspect guide rails, timing screws, belts, sensors, and bottle spacing. Look for scratches, loose mounts, and unusual gaps. A small alignment error can create another jam.
Remove all tools and close every guard. Confirm that workers are clear. Restore energy according to site procedure. Jog the machine slowly and observe one empty bottle.
Record the jam location, bottle condition, machine settings, and visible damage. Note the corrective action. The first diagnosis can be wrong. We sometimes restart too soon. Stop again if bottles lean, scrape, or hesitate.
Bottle jams can reduce production efficiency, damage containers, and create safety risks if they are not handled correctly. This guide explains How to handle bottle jams in automatic filling machines by first identifying common causes, such as misaligned bottles, excessive conveyor speed, incorrect guide-rail settings, or a buildup of containers near the filling area. Operators should also watch for warning signs, including unusual noise, uneven bottle movement, repeated stoppages, and inconsistent spacing.
When a jam occurs, stop the filling machine, isolate its power and pressure sources, and secure the surrounding work area before taking action. Remove the blockage carefully using approved tools and avoid forcing, twisting, or reaching into moving mechanisms. Afterward, inspect the conveyor, star wheels, sensors, guide rails, and timing settings for damage or misalignment. Run a controlled test with a small number of bottles, then restore normal operation only after movement is stable. Regular cleaning, preventive maintenance, operator training, and process monitoring can help prevent future jams.

Yongli Machine