Choosing China’s best liquid filling equipment requires more than comparing prices or advertised speed. A reliable machine should deliver consistent volume, protect product quality, and support practical maintenance. Operators must understand the pump type, filling principle, nozzle design, and container shape before changing settings. Small differences matter. A two-milliliter error can affect labeling, customer trust, and production costs.
This guide explains How to adjust filling volume on liquid filling equipment through a controlled, repeatable process. Depending on the machine, adjustment may involve piston stroke length, filling time, flow control, or a digital parameter panel. Begin with a clean system and a calibrated measuring container. Run several test fills, not just one. Record each result beside the target volume, product temperature, and operating speed. Thick syrup may require slower movement, while thin liquid can create dripping or foaming. Watch the nozzle closely.
Accuracy comes from verification.
Experienced technicians usually adjust in small increments, then repeat the test. They also inspect seals, valves, tubing, and air pressure because worn components can imitate incorrect settings. A machine may appear properly adjusted but still vary between containers. That weakness should not be ignored. Operators should review the equipment manual and follow the manufacturer’s safety instructions before opening guards or changing internal parts. In real production, perfect results do not always appear immediately. Careful records, routine calibration, and honest evaluation help identify the cause. The best equipment is not simply fast; it is stable, serviceable, and suitable for the liquid, container, and working environment.
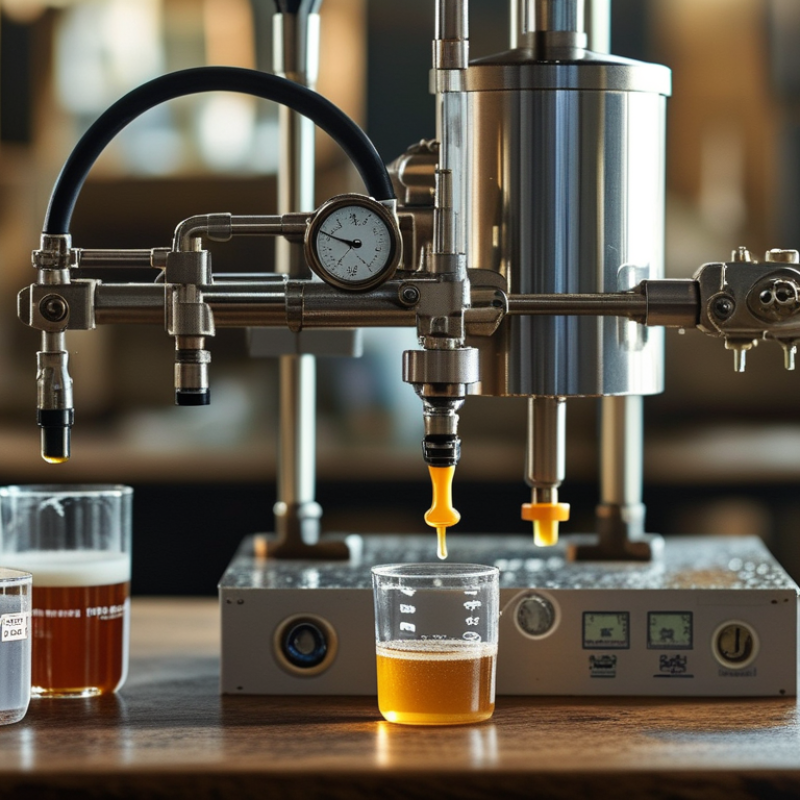
When evaluating liquid filling equipment in China, start with the product, not the machine’s appearance. Water-like liquids behave differently from syrups, gels, and foaming solutions. Production teams commonly use piston, peristaltic, gravity, overflow, or time-pressure fillers. Each type controls volume differently. Piston fillers set volume through cylinder stroke and piston diameter. They suit thicker liquids and repeatable portions. Peristaltic fillers measure liquid through tubing movement. They reduce product contact and support sensitive formulations.
Gravity systems depend on liquid height and filling time. An adjustable tank level can improve consistency. Overflow fillers use a return path to create the same visible level. They work well when bottle appearance matters. Time-pressure fillers combine air pressure with a timed valve. They can handle changing volumes, but pressure must remain stable. Foam, temperature, and nozzle height can quietly change results. That detail is easy to miss.
For accurate adjustment, begin with ten trial fills. Weigh each container, then compare the average with the target. Adjust stroke, speed, pressure, or filling time in small steps. Do not trust one bottle. Check the first, middle, and final containers from a run. A practical operator also records liquid temperature and viscosity. These values explain many unexplained shifts. I once corrected a volume error by changing speed, but the real cause was a warm product. That was a useful reminder: calibration needs observation, not only settings. Even a well-built filler needs routine checks, clean nozzles, and a verified scale.
Before adjusting a liquid filling machine, clean the nozzle, hopper, hoses, and weighing platform. Residue can change flow resistance and create false volume readings. Check the product temperature, viscosity, and container height. Even a small change matters.
The PMMI 2024 report on packaging machinery identifies faster changeovers and repeatable dosing as key production priorities. Use that principle during preparation. Select ten clean containers, weigh them empty, and record each result. Set the target volume on the control panel, then run a slow test cycle. Measure the filled containers by weight and convert the result using the product’s density. OIML R 61-1 evaluates filling instruments through test loads and maximum permissible errors, so one container is not enough evidence.
Record the nozzle size, pump speed, filling time, and product temperature. Adjust only one setting at a time. I often begin with filling time, then fine-tune pump speed. It is slower, but easier to trace. Do not chase a perfect reading from one sample. A ten-container average gives a more useful picture. If the variation remains high, inspect air bubbles, dripping valves, unstable pressure, or a loose scale. The 2023 ISPE guidance on process control also supports documented checks at startup and after changeovers. Still, the method needs review when products behave differently. A thicker liquid may need a longer settling period. Calibration records should include the operator, date, target volume, actual results, and corrective action. Keep the evidence.
The chart compares the selected target volume with the average volume measured from ten test fills after preparing and adjusting the machine. Use a calibrated measuring device, check the first samples, and fine-tune the filling time or piston stroke when the average differs from the target.
Measurement unit: millilitres (mL). The verification values represent a neutral test example across common liquid filling volumes.
Accurate filling starts with a clean, stable machine. Check the hopper, hoses, valves, and nozzles before making adjustments. Remove trapped air from the liquid path, because air bubbles can create uneven doses. Place an empty container under one nozzle and set the target volume on the control panel. Use a certified measuring cylinder or scale for verification.
Run at least ten test fills. Do not trust one sample. Record each result, then calculate the average volume. If the average is too low, increase the filling time, piston stroke, or pump setting slightly. If it is too high, reduce the same setting in small steps. Adjust only one parameter at a time. This makes the cause easier to identify. Keep the liquid temperature consistent, especially when filling oil, syrup, or other viscous materials.
Inspect the nozzle after every test cycle. A dripping tip can make the reading appear higher than the actual dose. Check the last container too, not only the first one. I have found that a machine may fill accurately at low speed but vary when production speed increases. That result needs attention, not excuses. Repeat the test after changing speed, container size, or liquid viscosity. Recalibrate when the average and variation no longer meet your internal quality limits. Record the final settings, test conditions, and operator observations for reliable future adjustments.
Accurate filling starts with a stable machine, not a quick knob adjustment. Clean the nozzle, confirm the tank level, and let the equipment reach operating temperature. Place a calibrated balance on a firm, vibration-free surface. For water-based liquids, weighing is usually more reliable than reading volume directly.
Set the target at 500 mL, then collect at least 30 fills during a practical accuracy check. Record every result, including the lightest and heaviest containers. Calculate the average, range, and standard deviation. A 1% tolerance means each 500 mL fill should remain between 495 and 505 mL. This example is useful, but your product density and process limits may require tighter control.
Adjust only one factor at a time. Change pump stroke, filling time, or pressure in small steps, then repeat the test. Check the first, middle, and final containers from the run. FDA’s 2011 Process Validation guidance recommends statistically sound sampling for process qualification. EU GMP Annex 15 also expects documented, risk-based verification. OIML R 117-1:2019 highlights the importance of measurement performance and permitted error limits.
Do not trust one perfect container. It can mislead you. Temperature, foam, dripping, and operator timing can change results. I have seen a machine pass a short test, then drift after continuous operation. Recheck after cleaning and product changeover. Keep balance calibration records, test sheets, adjustment values, and rejected samples. The weak point is often not the filler. It is incomplete evidence.
China Best Liquid Filling Equipment How to Adjust Volume?
Common volume errors often begin with an unstable supply, not the filling setting. Check the liquid level, temperature, and viscosity before changing the stroke length. A small temperature rise can thin some liquids and increase the delivered volume. Confirm the container sits directly under the nozzle. Even slight misalignment can cause splashing and an inaccurate reading. I have found that ten test fills reveal more than one hurried adjustment. Weigh each sample with a calibrated scale, then compare the average volume with the target.
If the volume is low, inspect air in the product line, loose connections, or a partially blocked nozzle. Air bubbles compress during filling and create inconsistent doses. If the volume is high, reduce the pump stroke or filling time in small steps. Do not change several settings at once. That makes the real cause difficult to identify. A worn seal may also allow product to bypass the measuring chamber. It is easy to overlook.
Tips: Keep the product temperature steady. Clean the nozzle before testing. Record every adjustment. Use at least ten samples. Recheck after the machine warms up. A perfect first adjustment is uncommon. Sometimes, my initial correction has been too large, so gradual changes remain safer. Empty containers can also vary slightly, which deserves attention during troubleshooting.
| Volume Adjustment Problem | Typical Symptoms | Likely Causes | Recommended Checks | Corrective Action | Verification Method |
|---|---|---|---|---|---|
| All containers are consistently underfilled or overfilled | The average fill volume is offset from the target, while container-to-container variation remains relatively small. |
|
|
Change only the volume-control parameter, such as piston stroke, pump displacement, or filling time. Make a small adjustment, run several containers, and repeat until the average reaches the target. | Collect at least 10 consecutive fills and compare the average with the target volume or mass. |
| Large variation between individual containers | Some containers are correctly filled, but others are noticeably high or low. |
|
|
Remove trapped air, stabilize the supply level and pressure, clean or service the filling valves, and maintain a consistent product temperature before recalibrating volume. | Calculate the range and standard deviation from a representative sample. Variation should remain within the process specification. |
| Fill volume decreases during continuous operation | Initial containers meet the target, but the volume gradually becomes lower during production. |
|
|
Maintain the specified feed level, clean blocked filters, tighten or replace leaking connections, and control product temperature. Do not compensate for a mechanical fault by continuously increasing the volume setting. | Run the machine at normal speed and compare the first, middle, and final samples. |
| Fill volume increases during continuous operation | Containers become progressively overfilled after the machine has been running for a period of time. |
|
|
Control product temperature and pressure, clean the valve seat, adjust the anti-drip or suck-back function where available, and replace worn sealing parts. | Check both the filled volume and the residual drip weight after each cycle. |
| Nozzle dripping after filling | Liquid continues to fall from the nozzle after the valve has closed, causing high fills and product on the container neck. |
|
|
Clean the nozzle, replace damaged seals, adjust shutoff timing gradually, and reduce residual line pressure. Confirm that the anti-drip setting does not introduce air into the product. | Place an empty container under the nozzle after the cycle and measure any residual liquid. |
| Foaming causes an incorrect apparent volume | The liquid level appears correct during filling but settles below the target after bubbles collapse. |
|
|
Reduce filling speed during the initial or final phase, use bottom-up or diving filling when suitable, lower the nozzle closer to the product surface, and minimize turbulence in the supply system. | Measure volume after a defined settling time using the same method for every sample. |
| Calibration by volume disagrees with calibration by weight | The container appears to have the correct volume, but the measured mass is outside the expected range, or vice versa. |
|
|
Use gravimetric calibration when practical. Convert mass to volume with the measured density at the process temperature, using the formula: Volume = Mass ÷ Density. | Perform repeated mass measurements and document product temperature, density, and tare values. |
| One nozzle fills differently from the others | Only one or more filling heads consistently produce a different volume. |
|
|
Clean or replace the affected component, equalize product-path restrictions, synchronize valve timing, and calibrate each head individually before returning to group operation. | Record separate sample results for every nozzle and compare the average and variation. |
| Adjustment has little or no effect | The operator changes the volume setting, but the measured fill remains nearly unchanged. |
|
|
Use the correct volume parameter, save and activate the intended recipe, and inspect the drive, piston, pump, or servo mechanism for mechanical restrictions before further adjustment. | Apply two clearly different test settings and confirm that the measured output changes accordingly. |
| Filling stops before the target volume is reached | The cycle ends early, or the pump cannot complete the programmed stroke. |
|
|
Restore product supply, clean or replace restricted components, correct operating pressure, and align or clean sensors. Restart calibration only after the full filling stroke is reliable. | Run several cycles at low speed first, then confirm stable operation at the intended production speed. |
| Volume changes after changing container size | A setting that worked for one container format produces incorrect results after a format change. |
|
|
Install the correct change parts, set nozzle height and immersion depth, confirm container positioning, and create a separate validated recipe for each container format. | Validate the first, middle, and last containers after every format change. |
| Volume becomes unstable at high production speed | Low-speed filling is accurate, but variation increases when the cycle rate is raised. |
|
|
Use a controlled acceleration profile, reduce peak speed, increase the stable filling portion of the cycle, and tune valve timing without exceeding the product or equipment limits. | Validate accuracy and repeatability at the actual production speed, not only during setup. |
| Measured volume is correct, but containers fail the fill-height check | The mass or calculated volume meets the target, but the visible liquid level differs between containers. |
|
|
Prioritize the legally or technically required control method, stabilize container positioning, reduce foaming, and define an acceptable fill-height range based on container geometry. | Use both gravimetric measurement and visual inspection when fill height is a critical quality attribute. |
| Volume changes after cleaning or product changeover | The equipment produces different volumes after sanitation, flushing, or switching to another liquid. |
|
|
Complete the approved rinse and purge sequence, prime the product path, allow the liquid to reach process temperature, and create a dedicated setting for products with different flow properties. | Discard setup fills as required and begin validation only after the product path contains a uniform product. |
Adjustment principle: Correct the average volume first, then control repeatability. Before changing settings, confirm stable product temperature, supply pressure, container positioning, nozzle condition, and measurement equipment. Always follow applicable safety, hygiene, and process-validation requirements.
Piston fillers often suit syrups, gels, and other thick liquids. They control volume through piston stroke and cylinder size. Still, viscosity changes can affect accuracy. Check the product temperature.
A peristaltic filler measures liquid through tubing movement. The liquid contacts mainly the tubing, not the pump mechanism. This can support sensitive formulations. Tubing wear may change results.
Clean the hopper, hoses, valves, nozzles, and weighing platform. Remove residue and trapped air from the liquid path. Check container height, product temperature, and viscosity. Small differences matter.
Run at least ten test fills. Weigh each container and calculate the average result. Check the first, middle, and final containers. One bottle proves very little.
Increase filling time, piston stroke, or pump speed slightly. Change only one setting at a time. Run another test group afterward. Small steps are safer.
Reduce filling time, piston stroke, or pump speed gradually. Inspect the nozzle for dripping before changing settings. A wet nozzle can falsely increase the measured weight. That mistake is easy to miss.
Temperature, viscosity, foam, pressure, and nozzle height can shift the result. A warm syrup may flow faster than a cool syrup. Higher production speed can also increase variation. The machine may not be the only cause.
Use a verified scale or measuring cylinder. Record the target, actual results, temperature, settings, and operator. Repeat checks after speed, container, or product changes. Keep the evidence.
Liquid filling equipment uses different volume control methods depending on its design, including time-based filling, piston measurement, flowmeter control, and weight-based filling. Before making adjustments, operators should clean the machine, inspect the filling nozzles, confirm the product temperature and viscosity, and ensure that the container size and filling settings are correct. Proper preparation helps prevent inaccurate results and protects the equipment from unnecessary wear.
To understand how to adjust filling volume on liquid filling equipment, begin with a small setting change based on the machine’s control system, then run several test containers. Collect and measure the filled product, compare the results with the target volume, and make gradual corrections until the average output is within the required tolerance. If the volume remains inconsistent, check for air bubbles, leaking valves, blocked nozzles, unstable pressure, or incorrect sensor signals. Regular calibration, consistent operating conditions, and documented test results help maintain reliable filling accuracy over time.

Yongli Machine