Cleaning a liquid filling machine is not merely a cosmetic task. Product residue can remain inside nozzles, filling valves, seals, and narrow transfer lines. Even a bright stainless-steel surface may hide contamination in a small connection. This guide introduces China’s top 10 liquid filling machines and explains How to clean liquid filling machines effectively, based on practical maintenance principles.
Dr. Tim Sandle, a pharmaceutical microbiologist and author, has stated, “Cleaning is the removal of unwanted matter.” This simple definition matters. Effective cleaning removes visible product, microorganisms, chemical residues, and particles without damaging machine components. Operators should follow the manufacturer’s manual, isolate electrical power, drain the product path, and select compatible detergents. Temperature, contact time, water quality, and rinsing pressure also require attention. Small details matter.
A reliable procedure usually includes pre-rinsing, disassembly, washing, rinsing, sanitizing, drying, and inspection. However, not every machine needs identical treatment. A syrup filler, oil filler, and sterile liquid filler may require different cleaning controls. That difference is easy to overlook. Operators should record cleaning dates, detergents, temperatures, inspection results, and any unusual residue. Swab testing or rinse-water testing may support verification where appropriate. No checklist is perfect. Human error still happens, especially around valves and gaskets. Therefore, this article also considers common mistakes, practical improvements, and points that deserve further review before production resumes.
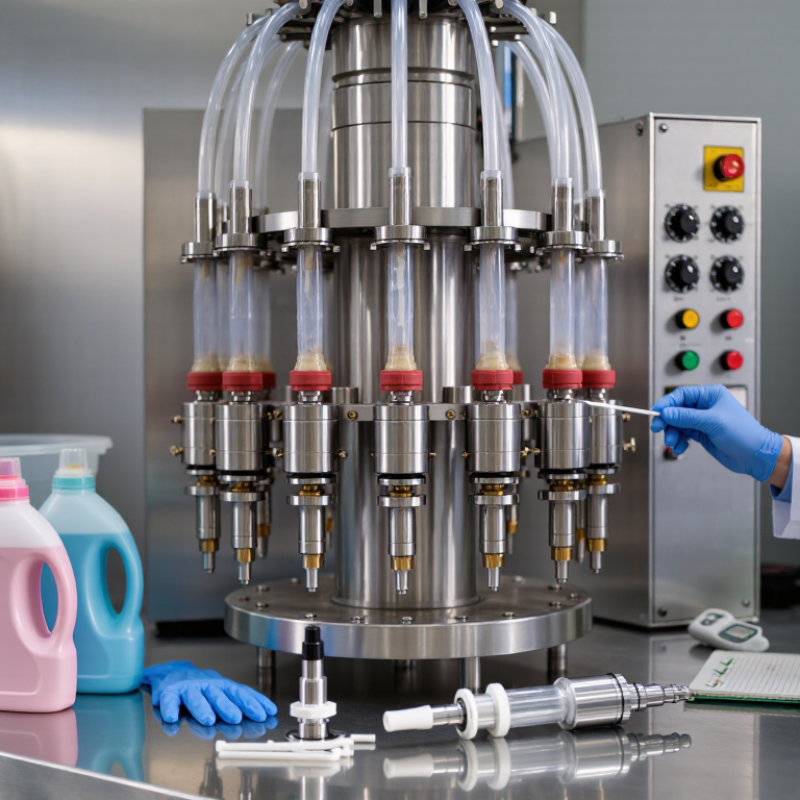
Liquid filling machines depend on clean, well-maintained components for accurate and safe operation.
Product-contact parts include the hopper, pump, valves, hoses, seals, filling nozzles, and connectors. Each part can retain residue, especially around threads and narrow passages.
These hidden areas deserve careful attention.
Before cleaning, isolate electrical power and release any stored pressure. Remove the hopper, hoses, nozzles, and removable valves according to the equipment procedure. Rinse product-contact parts with warm water before residue dries. Use a measured detergent that suits the machine materials and the filled product. Avoid harsh chemicals that may damage seals or stainless-steel surfaces. The frame and control panel need separate treatment. Moisture should never enter switches, sensors, or electrical housings.
Small brushes help clean valve seats and nozzle openings. Rinse until no foam or odor remains. Apply an approved sanitizer when the process requires it, then follow its contact time. Allow every component to drain and dry completely before reassembly.
Inspect seals for swelling, cracks, or flattening. Replace questionable parts rather than trusting appearance alone. I have seen a clean-looking hose release old residue after pressure returned. That mistake is easy to repeat.
Cleaning records should include the date, operator, detergent, sanitizer, and inspection results. Periodic verification, such as visual checks and residue testing, helps confirm that the procedure works. Not every cleaning cycle is perfect, so review failures honestly and adjust the method.
Safety preparation starts before water reaches the nozzle. Review the machine’s sanitation procedure, chemical safety data sheets, and maintenance records. Confirm that the product path is empty. Then isolate electrical, pneumatic, hydraulic, and thermal energy sources. OSHA’s Control of Hazardous Energy standard estimates that proper lockout/tagout prevents 120 deaths and 50,000 injuries annually in the United States. That figure makes preparation feel less optional.
Use a written pre-cleaning checklist. Record the operator, date, machine status, and isolation points. Turn off the main disconnect, close air valves, and bleed trapped pressure. Fit personal locks and tags, not loose notes. Test the start control after isolation, then return it to the off position. The test matters. A filling head can look still while pressure remains inside. NIOSH identifies unexpected startup and released energy as recurring causes of serious workplace injuries.
Inspect gloves, eye protection, footwear, and ventilation before handling detergents. Chemical labels and Safety Data Sheets should determine dilution, contact time, and first-aid measures. FDA food-safety guidance emphasizes hygienic equipment design and controlled sanitation practices. Remove jewelry and secure loose sleeves near moving parts. A second person should verify isolation on complex equipment. I have seen checklists signed too quickly; that is a weakness, not proof of safety. Stop if a valve is unidentified, a guard is damaged, or the procedure conflicts with the machine manual.
| No. | Safety Preparation | Required Action Before Cleaning | Safety Purpose | Completion Check |
|---|---|---|---|---|
| 1 | Review the Cleaning Procedure | Read the machine-specific standard operating procedure, cleaning instructions, and product changeover requirements before starting. | Ensures the correct cleaning sequence, approved chemicals, contact times, and disassembly limits are followed. | Procedure available |
| 2 | Check the Safety Data Sheets | Review the Safety Data Sheets for the product residue, detergents, sanitizers, and any other chemicals that may be used. | Identifies hazards such as corrosivity, flammability, inhalation risk, required PPE, spill response, and first-aid measures. | SDS reviewed |
| 3 | Wear Appropriate PPE | Use PPE specified by the risk assessment and SDS, such as protective gloves, safety goggles or a face shield, protective clothing, and safety footwear. | Reduces exposure to chemical splashes, product residues, sharp components, and contaminated surfaces. | PPE inspected |
| 4 | Stop the Filling Operation | Stop filling, remove containers from the work area, and place the machine in its designated safe or cleaning mode. | Prevents unexpected product discharge, container movement, and interference with cleaning activities. | Machine stopped |
| 5 | Disconnect and Isolate Energy Sources | Isolate electrical, pneumatic, hydraulic, steam, hot-water, and other relevant energy sources according to the site lockout/tagout procedure. | Prevents unexpected startup, actuator movement, electrical shock, and release of stored energy during cleaning. | Energy isolated |
| 6 | Relieve Pressure and Temperature | Allow heated parts to cool where necessary, shut off pressurized supplies, and safely vent or drain pressure from product and utility lines. | Reduces the risk of burns, injection injuries, uncontrolled spray, and sudden release of pressurized liquid or air. | Pressure at zero |
| 7 | Drain and Flush Product Residue | Drain remaining product from the hopper, tank, pump, manifold, hoses, nozzles, and other product-contact parts using the approved collection method. | Limits chemical reactions, cross-contamination, spills, and exposure to concentrated product residues. | Lines drained |
| 8 | Prepare the Cleaning Area | Remove unnecessary items, protect nearby electrical equipment, confirm adequate drainage, and place warning signs or barriers around the work area. | Controls slips, trips, splash hazards, unauthorized access, and water or chemical contact with sensitive equipment. | Area controlled |
| 9 | Inspect Tools and Cleaning Materials | Prepare approved brushes, lint-free wipes, hoses, containers, detergents, and sanitizers. Check that tools are clean, intact, and suitable for food or product-contact surfaces when applicable. | Prevents foreign-material contamination, surface damage, incorrect chemical use, and delays that may lead to unsafe shortcuts. | Tools approved |
| 10 | Confirm Safe Disassembly and Communication | Identify parts that may be removed safely, use the correct tools, label or retain small components, and notify affected personnel that cleaning is in progress. | Prevents dropped parts, incorrect reassembly, pinch-point injuries, accidental restart, and loss of traceability. | Team informed |
Cleaning a liquid filling machine starts with safety and product control. Stop the machine, isolate power, and close the supply valve. Remove remaining liquid from the hopper, hoses, pump, and filling nozzles. Wear suitable gloves and eye protection. Check the equipment manual before opening covers or seals. I have learned that a rushed shutdown leaves residue in small corners. That mistake can affect the next batch.
Flush product-contact parts with warm water if material instructions permit. Use a measured detergent approved for the machine and process. Brush nozzles, valves, gaskets, and hose connections with dedicated tools. Do not force sharp objects into openings. Rinse until water runs clear and no foam remains. Inspect every seal for swelling, cracks, or sticky deposits. Sanitize according to the site procedure, contact time, and concentration. Drain parts fully and air-dry them on a clean rack. Reassemble with clean hands. A dry surface matters.
Tips: Keep a cleaning checklist beside the machine. Record detergent concentration, rinse time, sanitizer contact time, and inspection results. Use separate brushes for different production areas. Replace damaged seals promptly, even when the machine still runs. Verify the first test fill for leaks, unusual flow, or trapped water. Visual inspection helps, but it is not perfect. Periodic swab testing and documented review provide stronger evidence. If a step feels unclear, stop and ask the responsible technician.
This reference cycle shows a typical 80-minute cleaning workflow for liquid filling equipment. The longest stages are detergent washing and manual cleaning of product-contact parts. Actual times, chemical concentration, temperature, and sanitation requirements should follow the validated site SOP.
Cleaning methods must match the liquid filling machine type. A piston filler usually needs product removal from the cylinder, piston, valve, and nozzle. Flush warm water through the product path, then use an approved detergent at the specified concentration. Rinse until the water runs clear. Inspect seals carefully; trapped residue often hides behind them.
Peristaltic fillers require special attention to tubing. Remove the tube after production, rinse it separately, and check for flattening, cracks, or cloudiness. Replace damaged tubing before the next run. Gravity and overflow fillers often have simple product paths, but their tanks, nozzles, and return lines still need complete flushing. Small vents can retain droplets.
For viscous liquids, allow extra draining time before rinsing. Heated water may help, but only when the machine materials permit it. Never spray sensitive electrical areas directly. Follow the equipment manual, chemical safety data, and your site’s sanitation procedure. Record cleaning time, detergent concentration, rinse results, and inspection findings.
A perfect cleaning routine is rare. In practice, operators may clean the visible surfaces and miss a gasket groove. I have found that a flashlight and a clean swab reveal more than a quick visual check. ATP testing or another validated method can provide stronger evidence than appearance alone. Residue still matters. Calibration, documented training, and scheduled deep cleaning improve reliability across different filler designs.
China Top 10 How to Clean Liquid Filling Machines
Inspection, Sanitization, and Maintenance After Cleaning
After cleaning, inspect the liquid filling machine under bright, neutral lighting. Check the filling nozzles, seals, hoses, valves, and product-contact surfaces. Look for residue, cloudy water marks, cracks, or unusual odors. A clean appearance is not enough. Small deposits can remain inside valve seats and connection points. Use a suitable inspection light and follow the equipment’s operating manual. Record the inspection time, operator, cleaning method, and any irregular findings. This creates reliable evidence for quality control.
Sanitize approved product-contact parts with the correct concentration and contact time. Excess sanitizer can create residue, while insufficient contact time may reduce effectiveness. Rinse only when the procedure requires it. Allow parts to drain completely before reassembly. Wet areas can encourage contamination. After assembly, check gasket placement and tighten connections evenly. Run a controlled water test and observe the flow pattern. I sometimes find that rushed reassembly causes more problems than cleaning itself. That step deserves more attention.
Tips: Use separate brushes for different components. Replace damaged seals immediately. Never use sharp tools on polished surfaces. Keep a maintenance checklist near the machine. If an odor remains, stop production and investigate again. Cleaning records should be reviewed regularly, because an overlooked detail can become a repeated failure.
Clean the hopper, pump, valves, hoses, seals, nozzles, and connectors. Residue often hides inside threads and narrow passages. Small brushes help reach valve seats and nozzle openings.
Stop the machine and isolate electrical, pneumatic, hydraulic, and thermal energy. Close supply valves and release trapped pressure. Test the start control, then return it to the off position. Do not rely on appearance alone.
Remove remaining liquid from the hopper, hoses, pump, and nozzles. Rinse parts with warm water before residue dries. Apply measured detergent suitable for the materials and product. Rinse until water runs clear, without foam or odor.
Use dedicated soft brushes for nozzles, valve seats, gaskets, and connections. Never push sharp objects into small openings. Inspect seals for cracks, swelling, flattening, or sticky deposits. Replace doubtful seals promptly.
Follow the equipment procedure and chemical safety information. Check dilution, contact time, ventilation, and first-aid instructions. Use sanitizer only when the process requires it. Harsh chemicals may damage seals or metal surfaces.
Treat the frame and control panel separately. Keep water away from switches, sensors, and electrical housings. Moisture inside controls can cause failures or unsafe operation. Dry surrounding surfaces carefully.
Let every removable part drain and dry completely. Reassemble with clean hands and correctly seated seals. Check hoses, connectors, and nozzles for trapped water or residue. A dry surface matters.
Record the date, operator, detergent, sanitizer, concentration, and inspection results. Verify the first test fill for leaks, unusual flow, or trapped water. Visual checks help, but they are not perfect. Periodic residue testing can reveal missed contamination. Review failed cleaning cycles honestly.
This guide explains How to clean liquid filling machines effectively by focusing on equipment components, hygiene requirements, and safe working practices. It describes how to prepare for cleaning by stopping production, disconnecting power and air supplies, wearing suitable protective equipment, and reviewing the machine’s operating instructions. Key areas such as filling nozzles, product-contact pipes, pumps, hoppers, valves, seals, and external surfaces require careful attention because residue can affect product quality and machine performance.
The article also presents a practical, step-by-step cleaning process, including draining remaining material, disassembling removable parts, rinsing, applying an appropriate cleaning solution, and completing a final rinse and drying stage. Different machine types may require manual cleaning, circulation cleaning, or specialized procedures depending on their design and the liquid being processed. After cleaning, operators should inspect components for wear, sanitize approved contact surfaces, confirm correct reassembly, lubricate where necessary, and record maintenance results to support reliable and hygienic operation.

Yongli Machine